
A complete property makeover is an incredibly thrilling undertaking that breathes brilliant new life into your living space, drastically boosting both your daily comfort and your long-term financial equity. There is a profound sense of accomplishment in taking a tired, outdated property and systematically transforming it into a high-functioning, aesthetically stunning sanctuary. However, behind every beautiful reveal is a massive logistical puzzle.
The remodeling industry is highly fragmented, filled with a massive spectrum of talent, experience, and reliability. Hiring the wrong people, prioritizing cosmetic interior fixes over critical structural integrity, or mismanaging the sequence of various trades can quickly result in blown budgets, stressful project delays, and shoddy workmanship that requires expensive corrections years down the line. It is not enough to simply have a vision; you must have the right team to execute that vision flawlessly.
This comprehensive guide demystifies the complex hiring process. It breaks down the property makeover into logical, manageable phases, providing expert criteria for selecting the exact specialists you need at every single stage of the journey. We will bypass the surface-level advice and dig into the technical questions you need to ask during the bidding process. By strategically vetting specialists and prioritizing structural and exterior upgrades before moving inward to delicate aesthetic finishes, you can orchestrate a seamless property makeover that is beautiful, exceptionally safe, and built to last for generations.
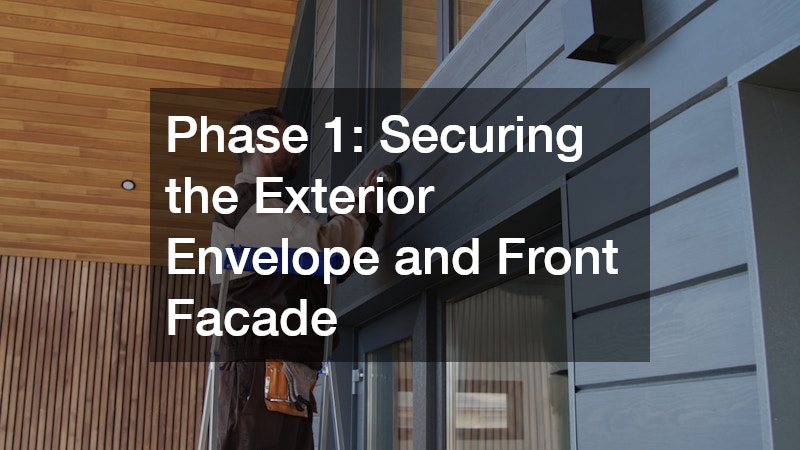


Phase 1: Securing the Exterior Envelope and Front Facade
Before you even think about knocking down an interior wall or picking out expensive tile, you must look to the sky. The absolute first step of any major property makeover is protecting the home from the elements and securing its largest entry points. Failing to secure the envelope means every dollar spent on the interior is entirely at risk.
Verify Ventilation Standards to Prevent Attic Mold
Your roof is the architectural armor of your home. It takes a relentless beating from solar radiation, torrential downpours, high-velocity winds, and heavy snow loads. When assessing your home for a makeover, inspecting the top of the house is critical. However, replacing a failing system requires far more than just hammering down new asphalt. The underlying science of moisture management is what separates a functional capstone from a liability.
When you begin collecting bids, the most important technical aspect to discuss is attic airflow. You must ask each contractor how they plan to balance your soffit (intake) and ridge (exhaust) ventilation. A failure to balance this airflow will trap humid air in the attic space. In the winter, this condensation drips onto your insulation and promotes toxic black mold. In the summer, the trapped, stagnant heat will literally bake your new shingles from the inside out, causing them to curl, blister, and fail decades before their warranty expires.
This is why vetting specialized roof installers is non-negotiable. During the interview process, you must demand a full tear-off down to the bare wooden decking. Layering new materials over old ones hides structural rot and adds massive, unnecessary weight to your home’s framing.
-
Inspect the Underlayment: Ask the team if they use traditional asphalt-saturated felt or modern synthetic underlayment. Synthetic materials are highly tear-resistant and provide a vastly superior, slip-resistant moisture barrier.
-
Mandate Ice and Water Shields: Ensure the contract specifically states that a thick, rubberized ice and water membrane will be installed along all eaves, in the valleys, and around every roof penetration (like chimneys and vent pipes) to prevent catastrophic leaks caused by ice dams.
-
Examine Flashing Techniques: The majority of leaks occur at the intersections, not in the middle of a field of shingles. Verify that the crew uses metal step flashing woven directly into the courses of shingles where the roof meets any vertical walls.
Upgrade to Thermally Broken Panels for Maximum Energy Efficiency
While the top of the house protects you from rain, the front facade heavily influences both your home’s curb appeal and its overall energy envelope. The largest moving part of your entire house is the main vehicle entry point, and it is frequently the most overlooked element in an exterior upgrade. Older, single-layer metal or wooden units are massive sources of energy loss, allowing freezing winter drafts or sweltering summer heat to easily infiltrate the home.
Upgrading to a highly efficient system instantly modernizes an outdated facade while providing a massive return on investment. You should insist on a minimum R-value of 12 for attached structures. Ensure the quoted price from any prospective team includes high-quality polyurethane insulation injected directly between the steel panels. This specific manufacturing process creates a “thermally broken” panel, meaning the outside steel does not physically touch the inside steel, preventing the transfer of extreme temperatures.
When you bring in a dedicated garage door company to evaluate your property, use the opportunity to completely modernize the mechanical systems as well.
-
Upgrade the Drive Mechanism: Swap out noisy, vibrating chain-drive openers for ultra-quiet, steel-reinforced belt-driven models. This is especially critical if there is a bedroom located directly above the space.
-
Demand Battery Backups: Ensure the new motor features an integrated battery backup system so you are never locked out of your home, or trapped inside, during a municipal power outage.
-
Integrate Smart Technology: Modern systems should come with built-in Wi-Fi capabilities, allowing you to monitor the status of the entryway, open it remotely for secure package deliveries, and receive push notifications on your smartphone.
Phase 2: Defining Borders and Upgrading Property Access
Once the primary structure is secure and energy-efficient, the makeover naturally shifts outward to the property lines and the high-traffic flatwork. This phase focuses on intense durability, enhancing property value, and establishing clear, secure boundaries.
Mandate a Minimum 4-Inch Crushed Stone Base to Prevent Cracking
Your driveway and exterior walkways are subjected to immense stress. They must support thousands of pounds of moving vehicular weight, endure chemical spills from motor oil, and survive brutal freeze-thaw cycles that actively try to rip the surface apart. If your current driveway is deeply rutted, covered in alligator cracks, or actively crumbling at the edges, a simple liquid seal coat will not save it.
The secret to a surface that lasts for decades lies entirely beneath the visible top layer. Never let a contractor pave directly over a failing sub-base. When you hire an experienced asphalt paving company, demand that their contract explicitly states the deep excavation of soft topsoil. They must install at least 4 to 6 inches of crushed, angular aggregate, which must then be aggressively compacted with a heavy vibratory roller. If the dirt beneath the surface is soft or capable of holding water, the new top layer will inevitably sink, heave, and crack within the first two winters.
-
Verify Drainage Slopes: Before any heavy equipment arrives, review the grading plan. The surface must maintain a minimum 2% cross-slope to shed rainwater quickly into designated swales, preventing puddles that freeze into dangerous black ice.
-
Discuss Edge Tamping: The edges of the surface are the most vulnerable to crumbling. Ensure the crew utilizes a 45-degree angled edge tamp to create a solid, compressed boundary that resists breaking off when a tire rolls over it.
-
Clarify Material Thickness: A standard residential driveway should have a compacted surface thickness of at least 2.5 to 3 inches. Ensure the contract specifies the “compacted” thickness, not the loose thickness before the roller is applied.
Check Local Easement Laws Before Setting Corner Posts
Establishing a clear property boundary is a fundamental aspect of a complete property makeover. It provides crucial security for pets and children, creates visual privacy for your backyard entertaining spaces, and definitively establishes your property lines. However, erecting a boundary structure is fraught with legal and logistical landmines if not handled by seasoned professionals.
Always demand a physical property line survey before signing off on a design. Never rely on an old, generalized plat map, or you risk building on your neighbor’s land and being legally forced to tear the structure down. Furthermore, it is a strict legal requirement to call your local utility marking service (811) before digging any post holes to avoid severing buried, high-voltage electrical lines, natural gas pipes, or fiber optic cables.
By hiring an established vinyl fence company, you offload the complex burden of municipal height restrictions, setback codes, and Homeowner Association (HOA) compliance. Furthermore, upgrading to polyvinyl chloride (PVC) materials ensures you receive a maintenance-free boundary that will never warp, splinter, or rot like traditional wood, nor will it require biennial staining.
-
Evaluate Wind Load Ratings: If you live in an area prone to severe storms, ensure the posts are routed deeply and reinforced with internal aluminum or steel channels to prevent the panels from blowing out.
-
Mandate Deep Concrete Footings: Every single post must be set in wet concrete that extends below the local frost line. Dry-packing dirt or gravel around the posts will lead to leaning and structural failure within a few years.
-
Check Hardware Quality: Ensure all gate hinges, latches, and drop rods are made from powder-coated stainless steel to prevent ugly rust streaks from bleeding down the pristine white panels after heavy rains.
Phase 3: Creating Multi-Level Outdoor Living Zones
With the property lines secure, the focus shifts to the backyard, expanding your home’s functional living space through elevated structures and integrated stone features. This phase is about bridging the gap between raw nature and comfortable residential living.
Insist on Frost-Depth Footings and Hidden Fasteners for Longevity
Adding a raised outdoor platform is one of the highest ROI projects you can undertake, providing a dedicated space for dining, grilling, and lounging. However, outdoor carpentry faces an incredibly hostile environment. The wood is constantly bombarded by UV radiation, soaked by torrential rain, and subjected to the heavy, dynamic weight loads of outdoor kitchens and large gatherings of guests.
Because of these extreme conditions, structural integrity is paramount. You must ensure the contract specifies pouring all concrete support footings at least 12 inches below your region’s specific frost line. If the concrete is poured too shallow, the expanding frozen earth will act like a hydraulic jack, heaving the posts upward and tearing the structure away from your house. This requires the expertise of a specialized deck building company that understands heavy load calculations and modern framing techniques.
-
Focus on Ledger Board Flashing: The ledger board (the piece of wood attaching the structure to your house) is the most critical failure point. It must be fastened with heavy-duty structural screws and meticulously wrapped in metal flashing to prevent water from rotting your home’s rim joist.
-
Demand Joist Tape: Before the surface boards are laid, the tops of all wooden joists should be covered in a waterproof butyl tape. This simple step prevents standing water from rotting the wooden substructure from the top down.
-
Request Hidden Clip Fasteners: If utilizing premium composite or PVC materials, insist on a hidden clip fastening system. This eliminates visible screw holes on the surface, providing a flawless, barefoot-friendly finish that won’t trap water or dirt.
Implement a 2% Cross-Slope to Direct Water Away from the Foundation
Ground-level transition areas, such as patios, retaining walls, and winding garden walkways, anchor the home to the earth. Upgrading these surfaces from cracked, poured concrete to sophisticated interlocking pavers fundamentally elevates the luxury feel of the entire property. However, managing hundreds of square feet of impermeable surface requires a deep understanding of subterranean engineering and water routing.
You must meticulously check the contractor’s grading plan to guarantee all new stone surfaces pitch at least one inch for every four feet (a roughly 2% slope) away from the home’s exterior walls. If a patio slopes toward the house, heavy rains will flood your basement and erode your foundation. A professional hardscaping company will manage the intense soil excavation, sub-base compaction, and complex drainage solutions required to keep the stones perfectly flat while actively routing water away from the structure.
-
Geotextile Fabric Installation: The excavated dirt must be covered with a heavy woven geotextile fabric before the gravel base is added. This prevents the soil from migrating up into the gravel and destroying the base’s structural integrity.
-
Manage Hydrostatic Pressure: If building a retaining wall taller than three feet, ensure the design includes a perforated drainage pipe wrapped in a silt sleeve, buried in clean gravel behind the wall. This relieves the immense, wall-crushing hydrostatic pressure that builds up in wet soil.
-
Utilize Polymeric Sand: Once the stones are laid, the joints must be filled with polymeric sand. When activated with a light mist of water, this specialized sand hardens like concrete mortar, locking the stones tightly together while preventing weed growth and ant infestations.
Phase 4: Cultivating Nature and Upgrading Core Utilities
This phase acts as the critical bridge between the exterior environment and the interior systems. It emphasizes smart, organic aesthetics outside, and the modernization of the hidden, high-voltage power management required inside.
Group Plants by Hydrozone to Minimize Water Waste
A property makeover is not complete until the hard architectural edges are softened by lush, vibrant vegetation. However, modern exterior design has moved far beyond water-hungry lawns and rows of identical, high-maintenance shrubs. To achieve a stunning aesthetic that doesn’t demand your entire weekend to maintain, you must embrace the agricultural science of hydrozoning.
Request a detailed planting schematic that groups vegetation strictly by their specific sunlight and watering needs. Mixing drought-tolerant native ornamental grasses with water-heavy ferns will inevitably result in root rot for one plant or a dried-out death for the other. By hiring a highly skilled landscaping company, you gain access to horticultural experts who will test your soil’s pH, amend the dirt with rich organic compost, and select native flora that naturally thrives in your specific geographic microclimate.
-
Prioritize Native Species: Native plants have evolved to withstand your local climate’s specific pests, droughts, and temperature swings, requiring drastically less chemical fertilizer and supplemental watering than exotic imports.
-
Install Point-Source Drip Lines: Abandon wildly inefficient overhead sprinklers that lose massive amounts of water to wind drift and evaporation. Install smart drip-irrigation grids directly beneath a thick layer of mulch to deliver water efficiently to the root zones.
-
Incorporate Low-Voltage Illumination: Extend the visual impact of your newly cultivated yard into the evening by designing a comprehensive lighting plan. Use warm LED uplighting on specimen trees, wash lighting on architectural columns, and soft path lights to ensure safe navigation after dark.
Upgrade to a 200-Amp Panel to Support Modern Smart Appliances
Moving inside the home, the most critical upgrades are often completely invisible. The electrical grid dictates the safety, convenience, and daily performance of your modern lifestyle. Today’s households demand an immense amount of power to run multiple large refrigerators, massive HVAC heat pumps, high-draw induction cooktops, and rapid Level 2 electric vehicle chargers.
If your home still utilizes an outdated 100-amp panel, or a historically dangerous brand like Federal Pacific or Zinsco, make upgrading the service drop your absolute number one interior priority. Pushing modern electrical loads through an antiquated panel generates intense heat, creating a severe, hidden fire hazard behind your drywall. Utilizing licensed electrician services is strictly non-negotiable for this task. They possess the deep technical knowledge to mitigate fire hazards, ensure proper structural grounding, and pull the necessary municipal permits required for modern power loads.
-
Implement AFCI and GFCI Breakers: Ensure the new panel is populated with Arc-Fault Circuit Interrupters (AFCI) to detect dangerous, hidden sparking in the walls, and Ground-Fault Circuit Interrupters (GFCI) to prevent electrocution in wet areas like kitchens and bathrooms.
-
Install Whole-Home Surge Protection: Protect your expensive smart appliances, computers, and home theater systems from devastating lightning strikes and municipal grid fluctuations by installing a heavy-duty surge protector directly at the main breaker box.
-
Run Empty Conduits for the Future: While the walls are open near the panel, have the crew run empty PVC conduit pipes to the attic and the garage. This forward-thinking step easily facilitates the future installation of solar panel arrays or high-speed data cables without tearing open freshly painted drywall.
Phase 5: High-Value Interior Transformations
The final phase of the makeover focuses on the most intimate, expensive, and high-impact areas of the home’s interior. These are the spaces you interact with most closely every single day: the high-moisture utility rooms and the foundational surfaces that span the entire footprint of the house.
Apply Topical Waterproofing Membranes Over Cement Board in Wet Areas
Bathrooms are highly technical indoor water management systems subjected to daily deluges of water, extreme humidity, and rapid temperature fluctuations. If the systems behind the drywall and beneath the custom tile fail, the resulting water damage will quietly rot the structural joists of your home for years before the problem becomes visible to the naked eye.
When remodeling these spaces, you must mandate the highest standards of moisture protection. Never accept standard water-resistant drywall (often called “green board”) in a shower enclosure. Demand a liquid-applied elastomeric coating or a sheet waterproofing membrane (like Schluter-Kerdi) directly over a solid cement backer board before a single piece of tile is laid. This prevents microscopic water vapor from penetrating the walls and growing black mold in the cavities. Top-tier bathroom remodeling services will expertly orchestrate this tight sequence of plumbing rough-ins, precise custom tile work, and proper ventilation required for a luxurious, leak-free space.
-
Upgrade to PEX or Copper Supply Lines: Take the opportunity while the walls are completely open to replace aging, corrosion-prone galvanized steel pipes with modern, flexible PEX or rigid copper to ensure decades of strong, leak-free water pressure.
-
Ensure the Shower Pan is Pre-Sloped: The mortar bed beneath the shower tile must be perfectly sloped at a 1/4-inch per foot drop toward the drain before the waterproofing membrane is applied. If the pan is flat, water will sit stagnant beneath the tile, degrading the thinset and creating foul odors.
-
Size the Exhaust Fan Properly: Proper ventilation is critical for longevity. Ensure the exhaust fan’s CFM (Cubic Feet per Minute) rating is appropriately sized for the room’s square footage, and absolutely verify that it vents directly outside through the roof, never into the attic.
Acclimate Materials for 72 Hours to Prevent Post-Installation Cupping
The property makeover culminates with the surface that grounds the entire interior design. The flooring spans every room, fundamentally influencing the home’s acoustics, visual warmth, and the level of daily maintenance required to keep the property looking pristine. However, installing high-end materials like solid hardwood or wide-plank engineered wood requires an intense respect for the biological nature of the materials.
Wood acts like a sponge, constantly absorbing and releasing moisture from the surrounding air. Ensure that any solid wood or engineered planks are delivered and left sitting in their sealed boxes in the climate-controlled installation room for at least three days prior to the job. This crucial acclimation period allows the wood to reach equilibrium with your home’s specific humidity levels. If installed while too wet, the boards will shrink and leave massive, ugly gaps; if installed too dry, they will absorb ambient moisture, expand, and forcefully cup or buckle off the subfloor. Hiring seasoned flooring services is critical for managing this reality, leveling uneven subfloors, executing tight room-to-room transitions, and applying flawless finishes.
-
Test Subfloor Moisture Content: Before a single plank is nailed down or glued, the wooden plywood subfloor must be tested with a digital moisture meter. It must be bone dry to prevent moisture from wicking up into the bottom of the expensive new hardwood.
-
Aggressively Level the Subfloor: Hardwood and large-format tiles require a remarkably flat surface. High spots in the subfloor must be aggressively sanded down, and low valleys must be filled with leveling compounds to prevent the floor from feeling spongy or squeaking loudly underfoot.
-
Leave Perimeter Expansion Gaps: Proper installation requires leaving a 1/2-inch gap around the entire perimeter of every room, which is later hidden perfectly beneath the baseboards. This gives the massive floor assembly the necessary room to expand during the humid summer months without buckling in the center of the room.
Conclusion
A complete property makeover is not a single, chaotic event; it is a highly choreographed, logically sequenced multi-phased operation. Taking a property down to its core and rebuilding it for the modern era relies entirely on assembling the right team of specialized experts and allowing them to execute their specific trades in the correct, structural order. From the overarching protection of the roof and exterior boundaries to the invisible, critical updates of the electrical grid, and finally finishing with the high-end interior spaces, every professional plays a vital role in the integrity of the final product.
The most vital advice any homeowner can heed during this massive undertaking is that the lowest bid is rarely the best bid. The dangers of hiring unlicensed workers, uninsured handymen, or “jack-of-all-trades” contractors for highly specialized tasks are simply too great. Always ask for physical proof of active liability and worker’s compensation insurance, verify state license numbers, and read through every line of a contract before signing on the dotted line or handing over a deposit.
The time for dreaming is over; the time for execution has arrived. Start by drafting your master priority list based on structural needs first. Set a realistic budget, ensuring you include a strict 20% buffer for the inevitable hidden surprises that arise during construction. Begin making calls to highly reviewed local specialists today, and take the first confident steps toward orchestrating the property makeover of a lifetime.